7 Proven Steps to SharePoint Project Management Automation & Workflow (Video Demo)
You are about to learn the 7 SharePoint Online steps you can follow to automate your Project Management workflow in your company. We will show you a real world example and watch the live video demo to see exactly how you can implement SharePoint at your company to manage the projects and handoffs. Here’s some best practices for using SharePoint for project management…
The 7 SharePoint Project Management Workflow Steps Are:
- Create a SharePoint site for Project Management
- Create a New Project set up form SharePoint List
- Track new projects and pending projects from sales
- Create Workflows that automatically send SharePoint email notifications to operations for hand-offs
- Create a Worklog SharePoint List for active projects assigned to Project Managers
- Create Workflows that notify Senior Managers and Project Managers as they get assigned to be resources on the project
- Let Project Managers and team members update the status of projects for the Project Dashboard
Watch the video demo now and read on below to see the Step-by-Step guide (with screenshots) demonstrating how to use SharePoint to manage projects.
This article walks you through a live demo of the HingePoint Work Log. It can be used to log and track projects for an entire company.
You can track and manage all your projects in two SharePoint list (database). One list is for New projects in Sales and once the project is approved it is moved to the second list for Active Projects in a Worklog.
Step 1 – Create a SharePoint Project Management Site
We like to create a nice SharePoint site for the users, so they have a good place to start and manage the entire project life cycle. For example, at HingePoint on our intranet home page you can access all the information you need on the job. See the link icon to the HingePoint Projects that goes to the Project Dashboard. On this project home page, you can access all the tools and data you need on the job. We use a SharePoint Communication Site template (in this case) with access to the New Project Set Up Form and data list, as well as access to the Worklog SharePoint list and we also have dashboards built on top of the SharePoint data accessible here.
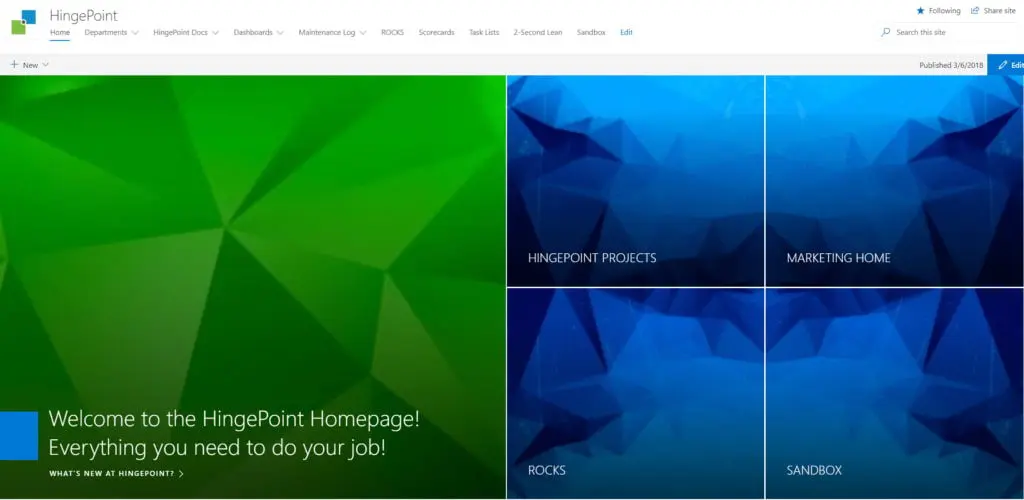
SharePoint Project Home Page
Then you click on HingePoint Projects and you arrive here:
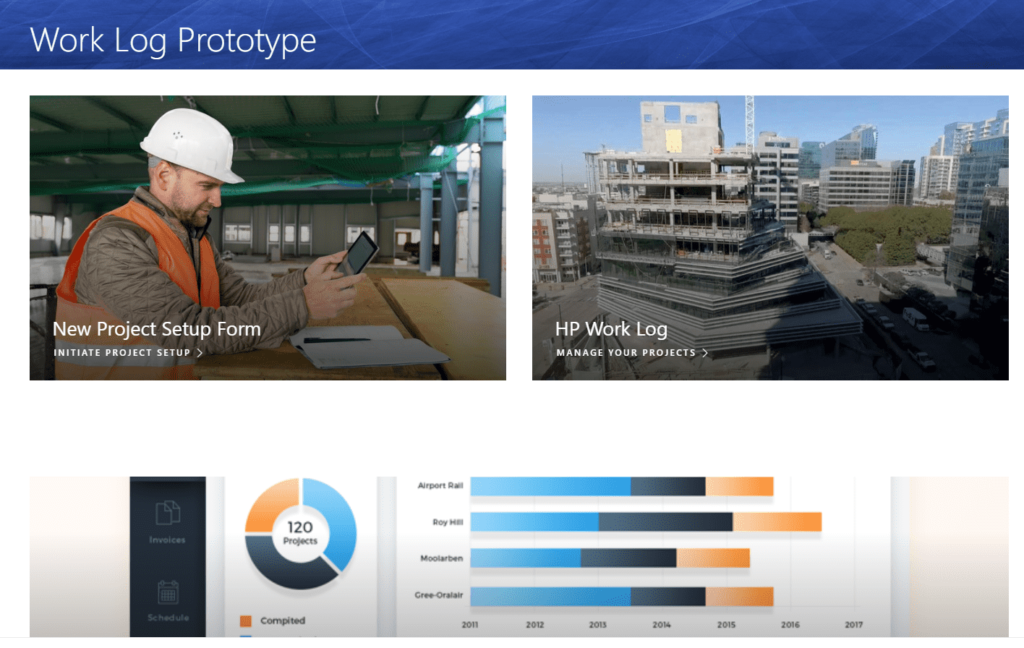
Project Management SharePoint Home Page
Step 2 – New Project SharePoint List
Here we have a new project data list in SharePoint. This is where Sales or Business Development teams can track all the new projects that the company is working on and manage key metrics such as:
- Track new projects
- Manage key revenue and client information
- Notify Operations teams of new projects that are starting or pending
- Automate project hand offs between sales and operations
Click the New Project Setup Form:

New Project Setup SharePoint Link
You arrive here where this screen shot shows the backlog of projects pending form sales. This can be used to plan team resources and who will be working on what projects in the future.

Step 3 -Track new projects and pending projects from sales
On this screen we are tracking all the needed information about a project. You can set up any data you need in this SharePoint List. From the navigation menu you can do the following items with the project information from the top navigation tool bar:

1. Search all the projects to find any information you need (this is huge!)
2. Create a New Project (we show that in the demo video)
3. Quick Edit allows you to edit all the project data all at once. Many users love this feature.
4. Flows – allows you to make “code-less” workflows in SharePoint Online, so no real code is required
To start a new project, go up here and press the new button. You can fill out this form of information:
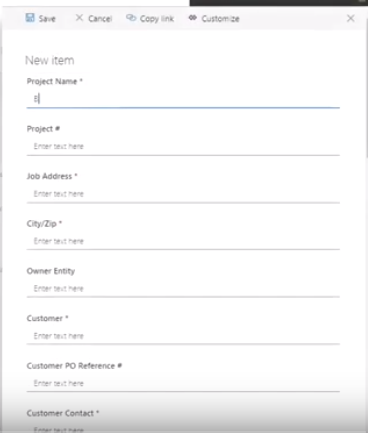
Fill out the project data. Here is a list of the project fields we use:
SharePoint List Columns
A column stores information about each item in the list. The following columns are currently available in this list:
- Project Name – create a good consistent naming scheme that will allow you to search and sort on projects
- Project # – get a good numbering scheme, one that ties to customers, projects, and financials
- Job Address – a location you can later use to plot on a map
- City/Zip
- Owner Entity – owner of the project
- Customer
- Customer PO Reference # – authorizing document from accounting and client
- Customer Contact
- Contact Email Address
- Contact Address
- Contact City/Zip
- Project Billing Date – we like to have a day the client committed to getting billed, and payment terms
- Booking Date – date project closed the sale
- Start Date – the date the client wants to start
- Completion Date – day project ends or is planned to end
- Division – if you have divisions in your company
- Job Type – we like to have categories of projects (small, medium, large. Or; software project, constructions project, marketing project)
- Billing Type
- Architect – who was the architect of the solution
- Job Size – some clients like to sort on job size
- Contract Amount (Pre-Tax) – total revenue
- Estimated Profit – make sure your plan for profitable work before it starts
- Full Time Supervision – does the project need full time or part time attention
- Project Difficulty – some clients rank projects on difficulty, either we need senior resources or junior resources, or a tough client
- Client Interaction – client notes
- Estimator – person that estimated the job so we can validate any assumptions they made on the job
Step 4 – Workflow Automation & SharePoint Email Notifications
SharePoint is an amazing tool for automating the workflow between roles in a team, department, or between companies or clients. SharePoint can send a “notification” email to anyone you want when you “trigger” that notification within SharePoint.
In this video demo, Sales sold a project and wants to notify operations that there is a new project. So you will see a series of emails to people to keep them informed and give them the needed information for them to pass the baton like a relay race.
If you Click Save from the New Project Set Up Form this triggers Office365 to send an email notification.
If we check my email inbox you can see I just got a new project notification request for your input. This is basically an approval email that is coming from the sales team manager because he’s the one who owns the workflow so a new project has been booked and the operations team needs to know about it.
There is a link to all the information about the project. See the sample email here:
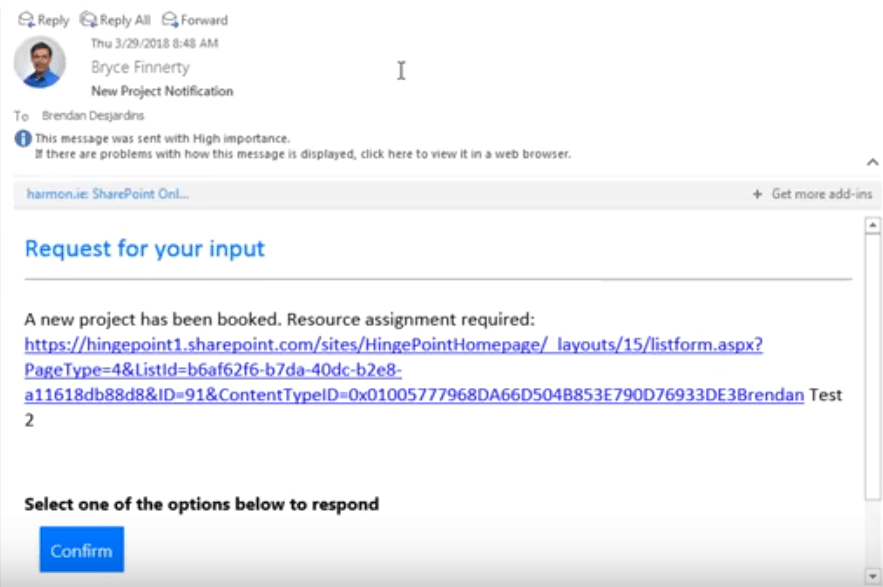
All I have to do is click “confirm” button to respond from within my email inbox.
I get a confirmation message from SharePoint and it also sends me a confirmation email that lets me know that it was responded to.

Now Sales and Operations know that the hand-off took place, we have record of it, and the next step is to schedule a kickoff meeting. You also get a confirmation email so you know for sure that they got your response and accepted the new project:
 The sales and estimator can meet with the project team to go over all the information on the job and collaborate on project planning.
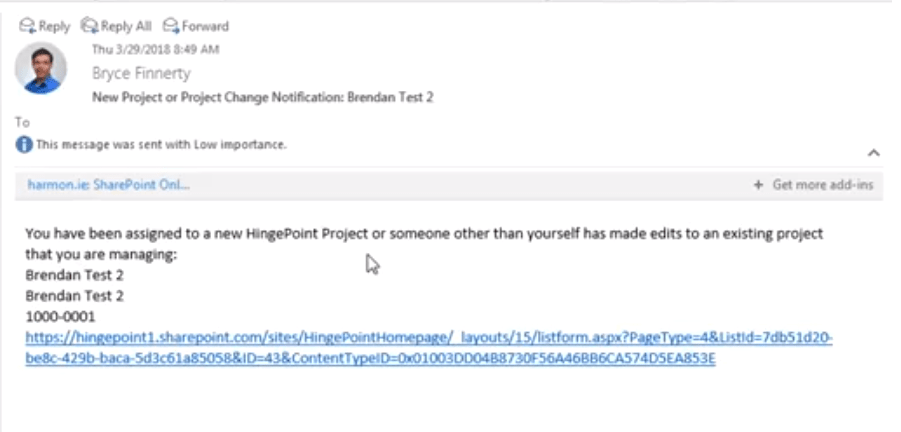
Once you are assigned to the project, if anyone other than yourself edits any of the data, we set up a notification that will alert you to any changes so you don’t need to have a meeting or loose any changes, you are always notified, in real time, and fully in the know of all information about your project. See a sample notification about changes to information here:
Step 5 – Create a Project Dashboard Worklog with a SharePoint List for active projects assigned to Project Managers
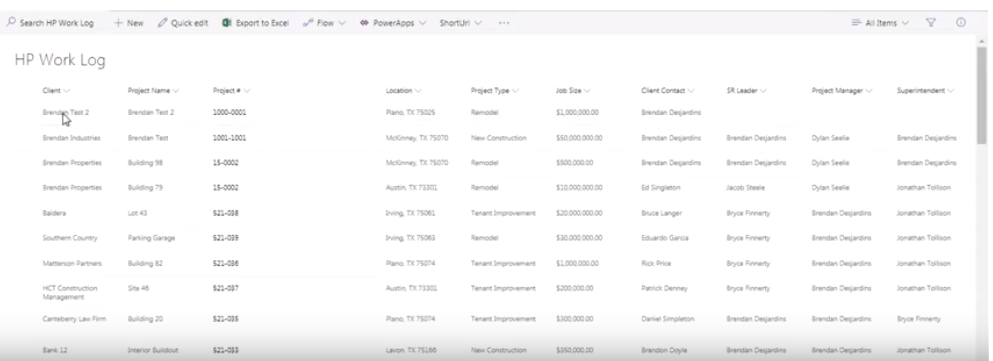
WorkLog is automatically Set up on a new SharePoint List called WorkLog. The project is also still back on the New Project List where you can delete it or treat it as an archive. Here you can notify all the team and they can click a Link back to the project to get all the information they need stored in one place in SharePoint. You can access the list from the Home Page under Manage Your Projects:

The image is linked to the Project Dashboard Worklog of all active projects on this new list here:
Step 6 – Create Workflows that notify Senior Managers and Project Managers as they get assigned to be resources on the project
From this screen the operations manager can assign key resources to the project. We show here how to hand-off and assign a Project Manager, Senior Manager, and Superintendent. As you assign people they get this email notification automatically.

Step 7 – Let Project Managers and team members update the status of projects for the Project Dashboard
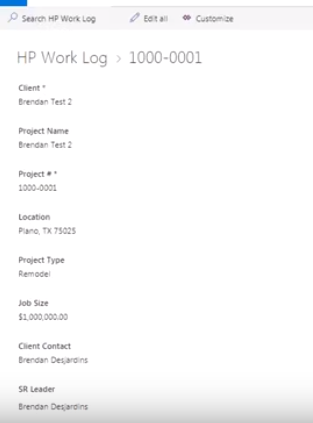
Now the Project Manager can see all the data they need about the project, as well as the date it was logged and then you can enter your budget, forecast and actual hours, etc. If they click the link in the email, they go straight to the source of the information in SharePoint so everyone is on the “same page” with project information. We set up a workflow that will notify the team members by email if there are any edits to the project information. This keeps everyone in sync to the most up-to-date information and cuts back on having team meetings. The below screenshot shows what the link in the email goes to (a screen of all the project information in SharePoint).
Need help with SharePoint? Our expert SharePoint consultants, developers, and integrators can make it easy. Contact us today!
SharePoint + Email = Teamwork
In this demo, we have automated much of notifications and manual steps in pushing projects through sales, estimating, over to operations and down to assigning Project managers and staffing the project. Almost all of it was automated. The benefits you will receive may include:
- Happy Employees
- Better relationships between sales, estimating, and operations
- Less busy work
- Fewer errors
- Increased accountability
- Improved communication
- Adoption and fans of SharePoint and Project Management tools
Customizing SharePoint is complex and exhausting. Wishing for a better way? We can help. Our expert SharePoint consultants, developers, and integrators can make it easy. Contact us today!
